Arcadia Wood Flooring handles engineered hardwood refinishing in Arcadia, CA, and after 20+ years on wood floors the rule we hold to is simple: nobody gets promised a full sand until the wear layer has been measured. A thin veneer in a newer house can take a screen and recoat but not a sanding, and finding that out halfway through a room means planks that have to be replaced.
Engineered floors look like solid hardwood from above, but underneath is a plywood or composite core covered by a real wood layer that may be generous or very thin. Two floors in the same neighborhood, installed in the same years, can need completely different treatment. So the first step is a look at the plank edge, not a price per square foot.
Once we know what the floor can handle, we recommend the lightest option that will actually hold, use a finish legal to apply in the South Coast air district, and give you a room-by-room schedule for getting back on the floor.
Measuring The Wear Layer First
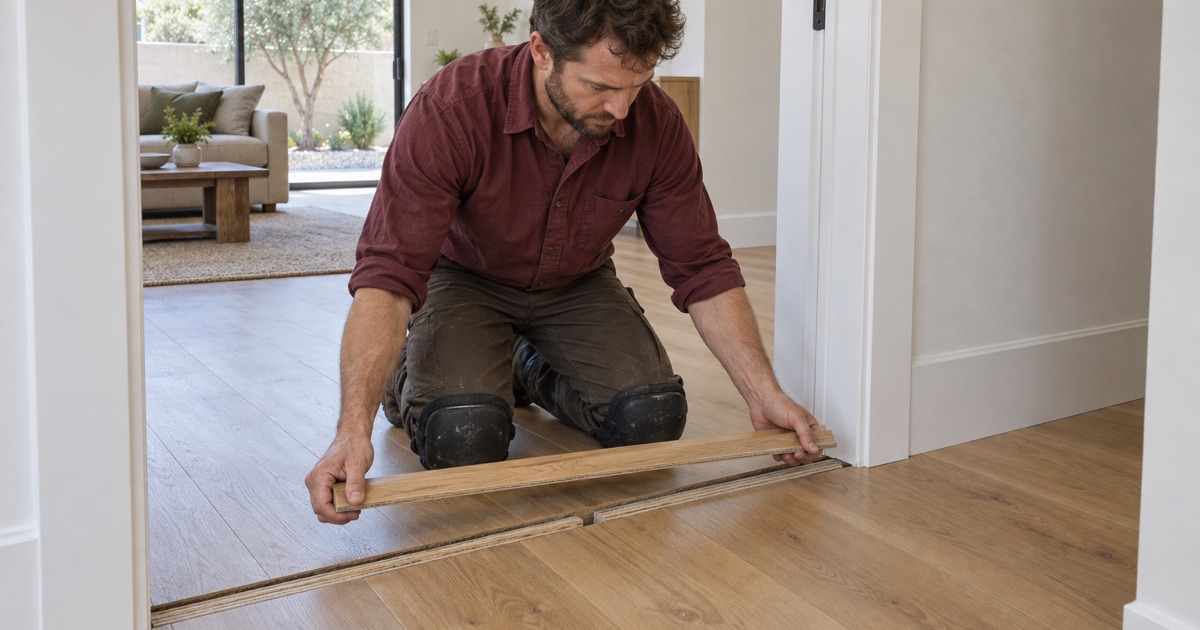
Where We Check Wear Layer Thickness
Wear layer thickness is usually visible at a floor vent, a stair nosing, a threshold or the edge of a plank near a transition. When none of those show a clean edge, a plank from a closet or low-traffic corner can sometimes be lifted to check.
We record what we find in the written scope. That measurement determines whether the floor gets a screen and recoat, a light sand or a replacement discussion.
Previous work matters too. A floor that was already sanded once by an earlier owner may have far less wood left than the original product carried, so we look for signs of past sanding such as uneven bevels, flattened texture or thin spots near walls before trusting the original specification.
Thin Veneers And Screen And Recoat
A thin veneer has very little wood to remove, and even a light pass with a drum sander can cut through it. On these floors, a screen and recoat is the safe path: abrading the existing finish and applying a new coat without cutting into the wood.
A screen and recoat refreshes dull, lightly scratched floors and adds protection. It will not remove deep scratches, stains or color, and we say that clearly before work starts.
Thicker Wear Layers And Careful Sanding
Engineered floors with thicker wear layers can often be sanded, but with less margin than solid hardwood. We use a controlled grit sequence and remove as little wood as possible to take out the old finish.
Edges and seams need extra care because many engineered planks have beveled edges and slight height differences. Chasing those differences with a sander is how floors get sanded through.
Problems Refinishing Cannot Fix
Veneer Delamination
Veneer delamination happens when the top wood layer separates from the core, showing as lifting edges, bubbles or hollow sounds. Water exposure and bond failures are common causes.
Sanding and recoating cannot reattach a separating veneer. Affected planks are replaced with matching product where possible, and the source of moisture is checked so the problem does not spread.
Deep Scratches, Dents And Sand-Through
Scratches that cut through the finish into the wood, dents from dropped objects and areas where earlier sanding exposed the core all limit what refinishing can do on a thin veneer. A screen and recoat seals the surface but leaves those marks visible.
Where damage is limited to a few planks, replacing those planks and recoating the room is often the best balance. When damage is widespread on a thin wear layer, replacement may be the more honest recommendation.
Moisture, Cupping And Gaps
Engineered floors are more stable than solid wood, but they still react to moisture, especially over slabs. Cupping, gaps or lifting planks point to a moisture or installation issue that refinishing will not solve.
We take moisture readings and look at how the floor was installed, whether glue-down, nail-down or floating. Those problems are addressed before any finish work.
Over concrete, a floating engineered floor with too little room at the walls can lift or pinch as it expands, while a glue-down floor over a damp slab can lose its bond in patches. Each points to a different fix, and a fresh coat of finish over either one simply hides the problem for a while.
Recoating Factory Finishes
Cleaning And Adhesion Testing
Many prefinished engineered floors have hard factory finishes that new coats struggle to bond to, especially if cleaners have left residue. Before a recoat, the floor is deep-cleaned and prepared with the correct abrasive or bonding system.
We test adhesion in a low-visibility area before coating the whole floor. A recoat that peels weeks later costs more than doing the test first.
Choosing A Compatible Finish
Waterborne polyurethane is a common choice for recoating engineered floors because it dries clear and keeps the existing color close to its current look. Sheen level can be adjusted, though beveled edges and texture will still show.
Every finish we use meets the South Coast air district limit of 275 grams per liter for wood coatings. We match sheen and finish type to how the room is used.
Beveled Edges And Wire-Brushed Surfaces
Micro-beveled edges and wire-brushed textures are common on engineered flooring. Sanding tends to flatten texture and can shrink or sharpen bevels, changing the look of the floor.
For textured floors, a careful recoat is often better than sanding. We explain how each option affects appearance before choosing a method.
Planning The Work In Your Home
Schedules And Cure Times
Screen and recoat jobs usually move faster than full sanding, with fewer days before rooms return to use. Cure time still matters, since rugs and heavy furniture should wait until the finish has hardened enough.
We provide a written room-by-room schedule showing when people can walk on the floor, when furniture returns and when rugs can go back. That plan helps owners, tenants and multigenerational households coordinate daily routines around the work.
- 20+ Years on Wood Floors
- Room-by-Room Schedules
- Stairs Priced by the Step